Buoy Repair 101
Pinholes, cracks, abrasions. They're unavoidable and death for swim buoys. Fortunately, they can be patched and stretch out the life of the buoy. Unfortunately, some holes are harder than others to successfully patch. To illustrate I have patched three different buoys of different construction with holes in different places. I'll follow up at the end and report which buoys are doing the best one month after being patched.
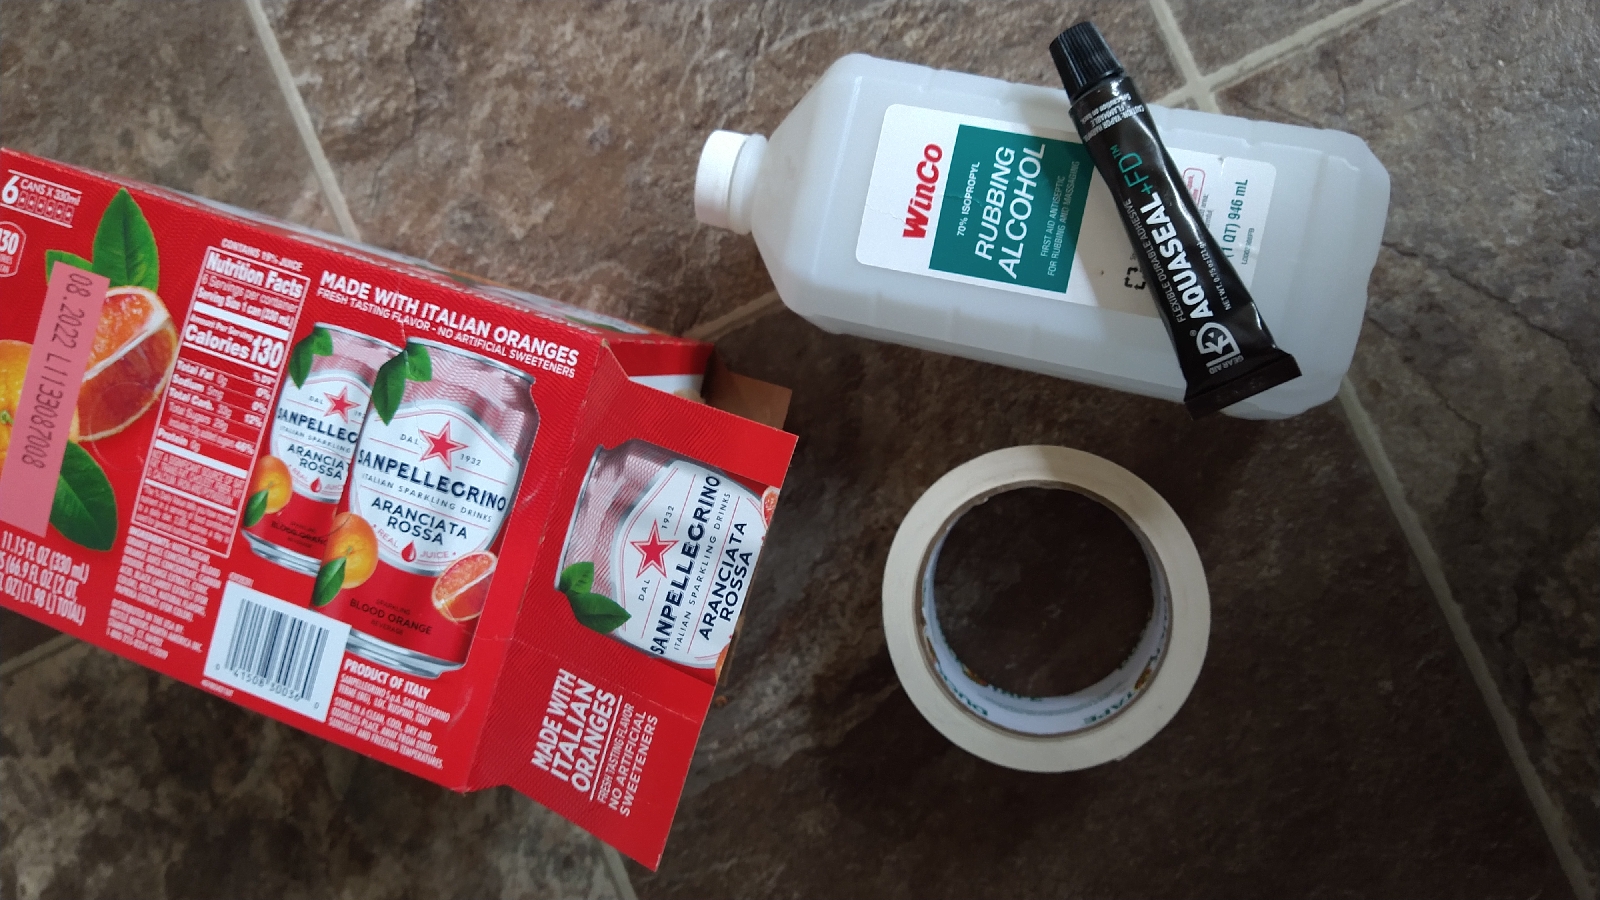
You will need the following things to begin.
1. Dish soap & bathtub or bucket full of water.
2. Rubbing alcohol.
3. Duct tape or masking tape.
4. Aquaseal brand wetsuit cement (Try others, but this is the brand I've used for years to repair gear. It can be purchased at REI, Wal-Mart, or most marine supply stores.)
5. Something to spread it with (I frequently will use cardboard and cut it into scrapers) paper towels.
6. Patience.
7. More patience.
8. If you're messy like me: Craft gloves. Aquaseal gets everywhere and does not come off of hands easily.
Step 1: Give your buoy a bath!
Inflate as much as possible and cover the buoy in soapy water. Squeeze gently and watch for bubbles to form. Initially, they may look like clusters which means there is too much soap. Rinse the buoy and squeeze again. Typically, a single larger bubble will form after that.


If you don't notice any bubbles forming on the outside of the buoy, the holes may be in the interior compartment (as in the example below). If the holes aren't obvious on visual inspection (these were) then lightly inflate you buoy, turn it inside out and repeated the process above.
I find it helpful to circle the holes or otherwise indicated them so I know exactly where to apply the Aquaseal later on.

Step 2: Thoroughly rinse your buoy and clean it with rubbing alcohol to ensure the surface is free of dirt, oil, and debris as much as possible.
Optional sub-step: While the buoy is drying cut up cardboard into spreaders.
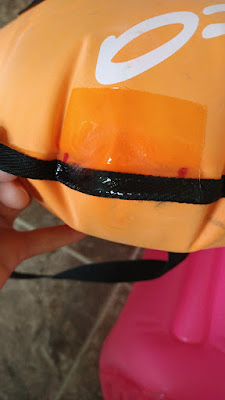
Step 3: Mask off the holes with at least a half-inch border. Giving the Aquaseal a clean border helps prevent it from peeling up.

Step 4: Apply Aquaseal. I apply directly onto the buoy and then use my custom cardboard scrapers to smear it around and remove as many air bubbles as possible.

Step 5: Wait. Some types of Aquaseal will require longer cure times than others, generally, I wait 4-6 hours before removing the masking tape, and a whole 24 hours from when I initially applied the Aquaseal before inflating and checking my repair job.

Step 6: Inflate your buoy and put it in a sunny spot (this will expand air inside and force air out, helping you see if the repair held) and let it sit for a few hours. Go back and do a "squeeze test" to see how much air has escaped.
As you can see from the below images, both buoys that had holes along the seam where the material has a fabric border did not hold air as well as the buoy with holes in the plastic/vinyl/whatever-these-things-are-made-of. This is somewhat expected since I don't really know where the hole is. However, I did check the insides of both of these buoys for holes and did not find any, so I know that the spots I patched are the culprits. I'll also note that while the patch was not perfect and air still escapes, I have used both buoys since repairing them and they both hold air much better than before. So, there's that.


Follow-up: All buoys are sidelined for now with my shoulder injury. We'll take them out and test again once I'm cleared by PT.
HEY! Do you have some buoy repair tips to share? I would love to learn about how you do it. Especially if you know how to get those pesky fabric seams to stop leaking. Please leave a comment below or consider being a guest contributor for Buoy Repair 102!

I love how your brain works. This is great info. Thank you!
ReplyDeleteYou're most welcome!
Delete